So often we hear that people and business don’t have a recent copy of their website that they can access offline, and are relying on their hosting provider to back up there website.
When backing up a web site there are 2 aspects that you need to backup. The website data and any databases, if available
· One is the website data that is stored in the root folder. This is the folder where the index.html or index.php file is located. Often it is in a folder named public_html or httpdocs. To access this location I would recommend using a FTP client like Filezilla. This can be downloaded for free from http://filezilla-project.org/download.php.
· Two is if there are any databases. You will need to export these. The easiest way is to login to your web hosting control panel and export them using the database admin
Download the Website data using FTP.
1. Using Filezilla enter the Host (usually ftp.domain.com.au), Username and Password for the websites FTP that you are needing to back up. Click on Quickconnect![]()
2. The Main folder needs to be downloaded. The main folder is, from the Remote site, public_html
3. On the local site ensure that you have created a folder in T:\WebHosting\Sites\Domain.com.au todownload the remote site folder into.
4. Right click on the remote site folder public_html and click Download. This will download the folder/s selected to download to the selected folder on the Local Site.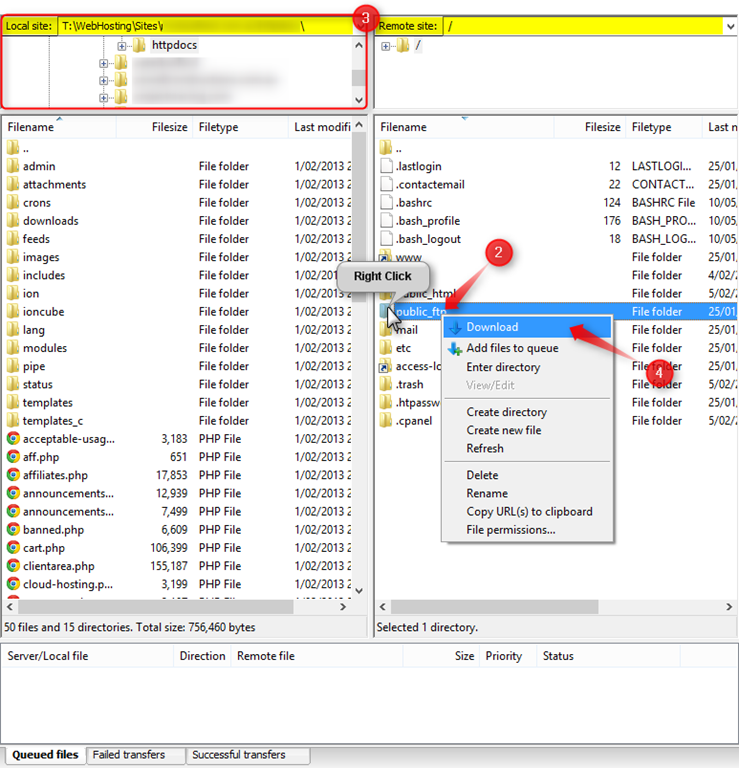
Backing up MySQL databases using phpMyAdmin
1. Go to www.mycloudhost.com.au/cpanel
2. Enter your Username and Password that you were give when you signed up for the hosting.
If you are ready have hosting, for another domain, the username and password will be the same as your current hosting login. Please contact Insane Technologies if you require the password to be reset.

3. Under Databases click on the phpMyAdmin icon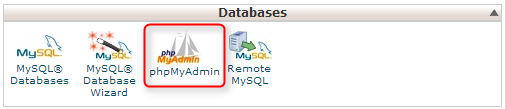
4. Click on Database tab
5. Select the database tab that you wish to back up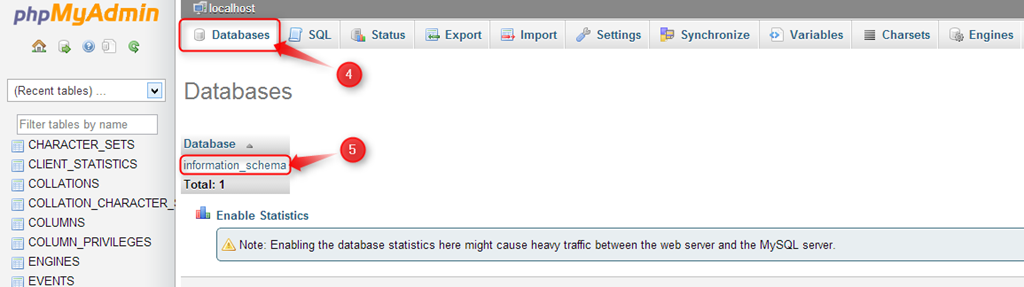
6. Click on the Export tab
7. Once in the Export page ensure that the following is checked. Most of this will be selected as default
a. Choose, under Export Method:, Custom – display all possible options.
b. Under Table (s): ensure that Select All is selected
c. Leave, Output:, Format: and Format-specific options as default (unless you are experienced with SQL databases and require to make changes)
d. Under Object creation option ensure that Add Drop Table….. is ticked
e. Select GO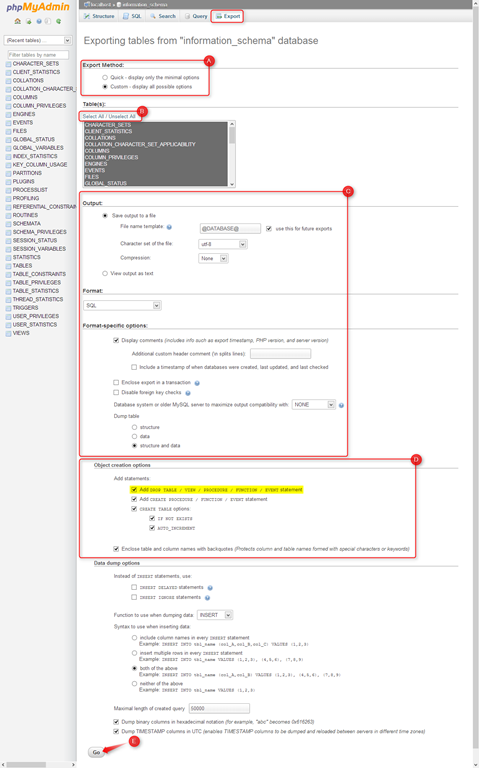
8. A databasename.sql file will be downloaded. Save this Database to your computer.
This should now mean that you have a local/offline copy of your website and any databases.
Enjoy
